Process: The Steps Involved![]()
![]()
![]()
Step 1: Transferring the design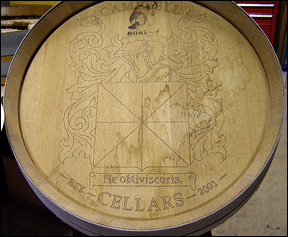 Once the design is blown up using the computer to the size needed for the barrel head, it's tiled (pieced to fit on 8 1/2"X 11" sheets then taped together), the line is transferred to the wood surface using carbon paper. |
Step 2: Incising the line The line is then brought down into the wood (incised) using flat chisels to define the outline. Rough removal of wood surrounding the design begins the establishment of what will eventually be the background of the carving. |
Step 3: Letter refining and rough shaping The lettering is roughed out as the background depth is increased in incremental steps. |
Step 3 Detail: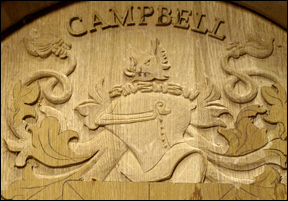 The final background level is established in and around the lettering. This allows for the rough shaping of the rest of the images in the carving to begin. |
Step 4: Image refining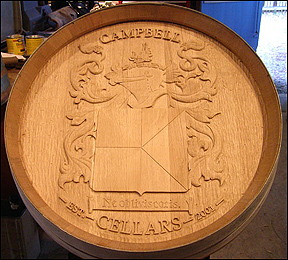 The image is rough carved, shaped, filed, sanded and steel wooled into it's final pre-coloring stage. The background is gone over once again with a gouge, by hand to eliminated any undesired tooling marks. |
Step 5: Staining and prep for leafing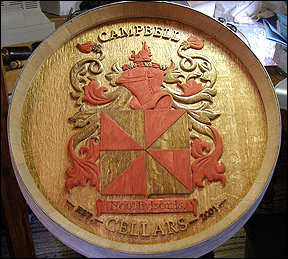 Staining the background and the dark areas of the family crest image creates greater depth illusion. Areas that will receive gold and silver leaf are sealed and get a red basecoat that enhances the final result. |
Step 6: Gold and silver leaf application 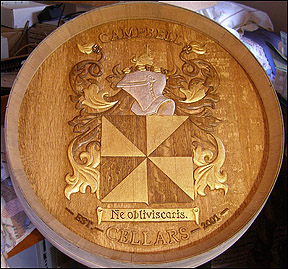 Gold and silver leaf is applied then an 'antiquing' glaze is worked into the crevasses and cracks giving it a richer appearance. |
Final: Finishing and varnishing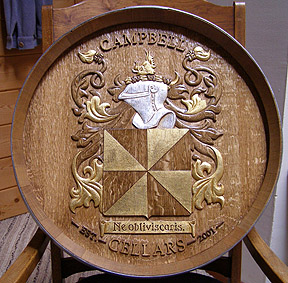 The hoops of the remaining sides of the barrel head are wire brushed and the exposed wood of the staves are sanded. Two double wet applications of varnish in a satin finish are sprayed in four directions to coat and protect all surfaces and angles of the barrel head. |
© 2008 AW Shadows Design
 Home
Home